Choosing the best base for a shed is one of those decisions that rarely feels exciting at the start, but it decides how well your shed performs for years. A strong shed base keeps the building level, supports the weight evenly, improves drainage, reduces damp risk and helps prevent doors from sticking or walls from twisting. A weak base does the opposite: it lets the shed sink, lean, rot or become difficult to use.
For UK homeowners, the challenge is that there is no single perfect base for every garden shed. The right option depends on the size of the shed, the ground beneath it, how exposed the site is, how much weight will be stored inside and how permanent you want the installation to be.
This guide explains what is the best base for a shed in different situations, compares the main base types, outlines how to install a concrete shed base, and highlights the mistakes that shorten the life of otherwise good garden sheds.
The best base for a shed is not just a flat surface. It is the part of the installation that protects the structure from movement, damp and long-term stress.
A shed spreads its weight through the floor and walls. If the base underneath is uneven, soft or poorly compacted, that weight is not supported evenly. Over time, the shed may settle in one corner, causing the frame to twist. Once that happens, doors and windows can stop lining up properly, roof joints can come under pressure, and water may find its way into gaps.
Drainage is just as important. Timber sheds are especially vulnerable when the floor sits close to damp ground or standing water. A raised, level and well-drained base helps keep moisture away from the underside of the shed. Some shed installation guidance recommends using a damp-proof membrane beneath concrete or slab bases to reduce moisture rising from the ground.
A proper sub-base also matters because it spreads load and reduces settlement. Paving Expert explains that the sub-base is often the main load-bearing layer, helping to distribute weight to the ground beneath while aiding drainage and preventing settlement.
For a small storage shed, the base may seem like a minor detail. For a larger shed used for tools, bikes, machinery or workshop equipment, it becomes essential.
Takeaway: A shed base protects the building from below. Get it right, and the shed stays level, dry and usable for longer.
There are four common shed base options for UK gardens: concrete, paving slabs, gravel and timber frames. Each has a place, but they are not equally suitable for every shed.
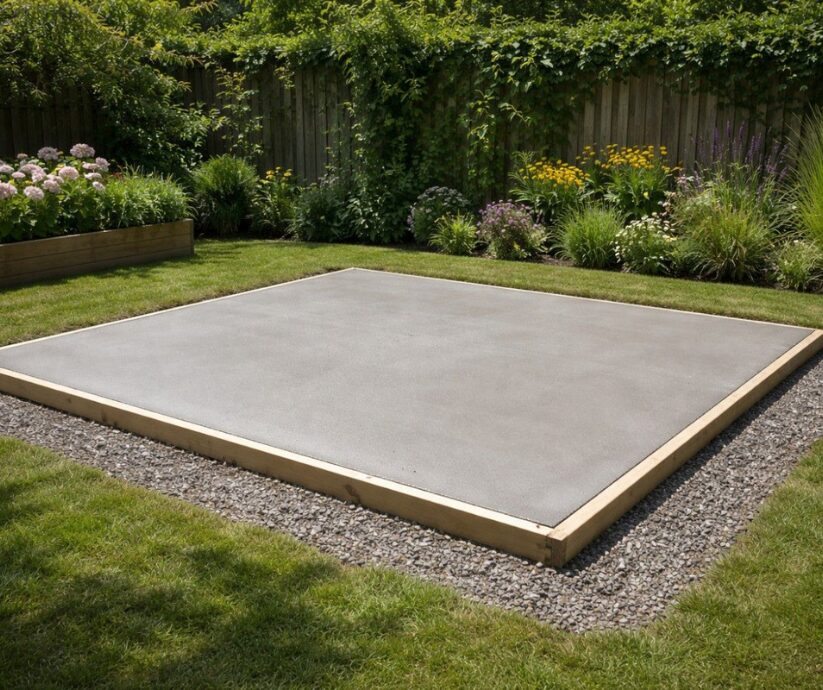
A concrete base is usually the strongest and most permanent option. It is ideal for larger sheds, heavy-duty storage, workshops and long-term installations. A well-laid concrete slab gives excellent load support and a clean, level surface. For many standard garden sheds, practical shed base guidance suggests around a 100mm concrete slab over 100–150mm of compacted hardcore, with heavier structures potentially needing a thicker slab.
Paving slabs can also work well, especially for small and medium sheds. They are often more affordable than concrete and easier for competent DIYers to install. However, slabs should not simply be placed directly onto grass or loose soil. They need excavation, a compacted sub-base and a bedding layer if they are going to remain stable.
Gravel is popular because it drains well and can be cost-effective. It is particularly useful when paired with a timber or plastic grid system, or where the shed has pressure-treated bearers that keep the floor raised. The key is to use angular gravel or compacted aggregate rather than rounded decorative stones, which move too easily under load.
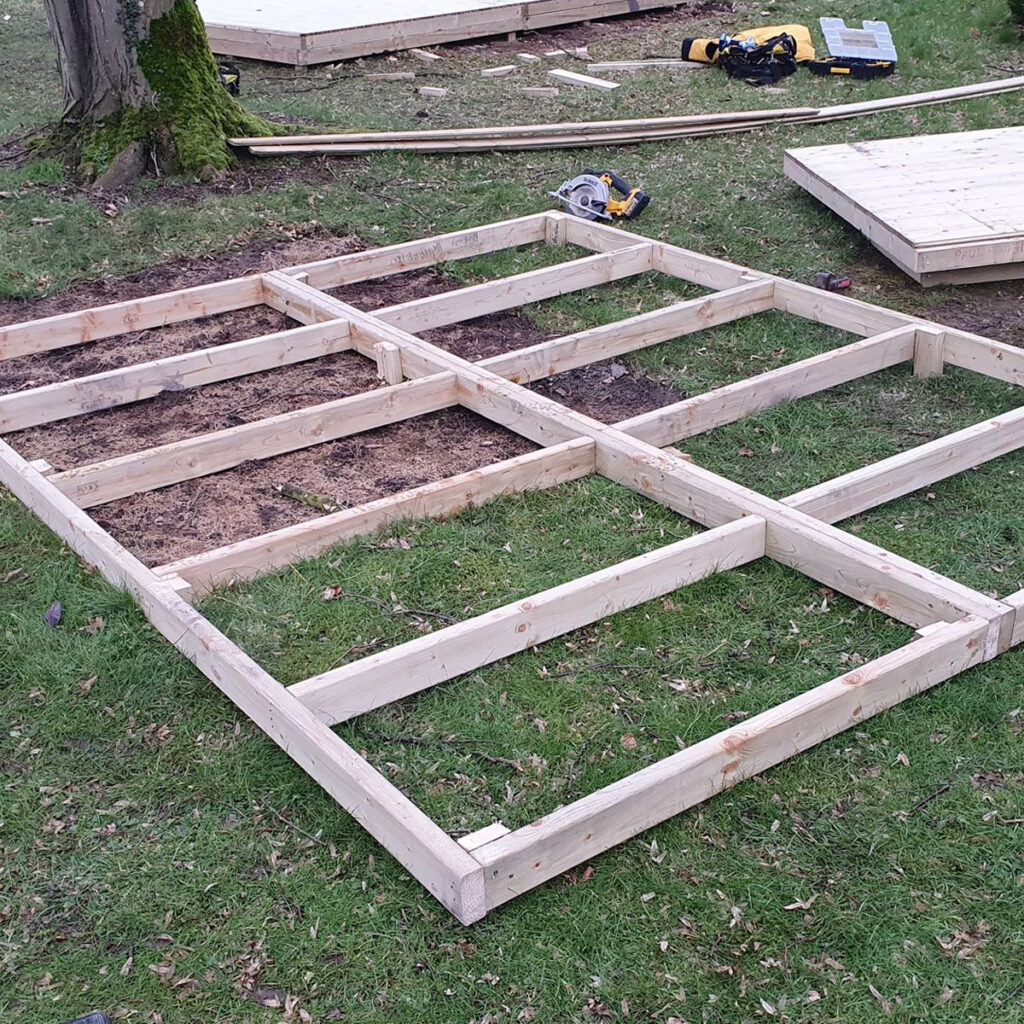
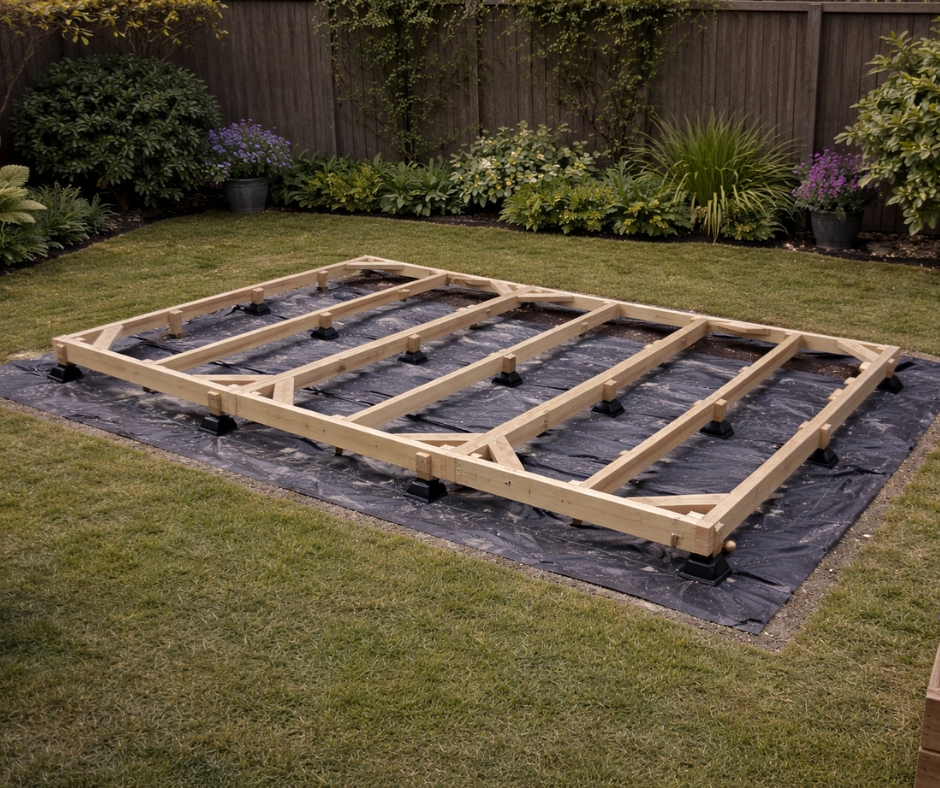
A timber frame base can be useful on slightly uneven ground or where a raised base is needed. However, it must be built from treated timber, supported properly and kept clear of standing water. Poorly supported timber bases can sag, rot or transfer movement into the shed.
Takeaway: Concrete is best for strength and permanence; slabs suit many domestic sheds; gravel is excellent for drainage; timber frames are useful where the shed needs to be raised.
The right base depends on the shed, the site and how the building will be used. Before choosing a base type, assess five practical factors.
First, consider shed size and weight. A small tool store does not need the same foundation as a large workshop shed. The heavier the building and contents, the more important load-bearing strength becomes. Concrete or properly laid paving slabs are usually safer choices for larger sheds.
Second, check the ground. Clay soil, soft soil, tree roots, poor drainage and uneven levels all affect base performance. A site that holds water after rain needs drainage planning before the shed goes in. Installing a shed on damp, shaded ground without ventilation increases the risk of mould, rust and rot, according to expert advice on common shed mistakes.
Third, think about water movement. The base should keep the shed above wet ground and allow rainwater to move away. The area around the shed should not trap water against the walls. Adding a gravel strip around the base can help reduce splashback and improve drainage.
Fourth, decide how permanent the shed will be. A concrete slab is strong but difficult to remove. Gravel or slab bases are easier to adapt if the garden layout changes later.
Fifth, check access and practical installation limits. Concrete needs materials, mixing or delivery, formwork and curing time. Slabs require careful levelling. Gravel requires excavation, edging and compaction. The easiest option on paper may not be the easiest option in your actual garden.
Takeaway: The best base is the one that matches the shed’s weight, the garden’s drainage and the level of permanence you want.
A concrete base is often the best choice when durability is the priority. It creates a solid, level platform that can support larger garden sheds, heavy storage and regular use.
Start by choosing the location. Avoid low points where water naturally gathers. Mark out the base using pegs and string, checking that it is square by measuring diagonals. The base should be level and accurately sized for the shed. Some suppliers advise that the base should not be unnecessarily larger than the shed floor, as exposed concrete around the edges can hold water near the building if not detailed properly.
Next, excavate the area. Remove turf and topsoil, then dig deep enough for the compacted sub-base and concrete slab. For many domestic sheds, practical guidance suggests a compacted hardcore layer beneath a slab of around 100mm, though heavier sheds may need more.
Add a compacted sub-base using MOT Type 1 or similar angular aggregate. Paving Expert notes that Type 1 materials rely on crushed, graded particles that interlock when compacted, giving them load-bearing capability.
Install timber formwork around the edge and check it is level. Lay a damp-proof membrane if appropriate, taking care not to puncture it. Then pour the concrete, spread it evenly and tamp it level using a straight board.
Curing matters. Concrete gains strength through hydration, so it should be protected from drying too quickly. CEMEX guidance explains that maintaining moisture is important while concrete cures. Allow sufficient curing time before installing the shed, especially in cold or wet UK weather.
Takeaway: A concrete base is only as good as its preparation. Excavation, compaction, levelling and curing all affect the result.
Gravel can be an excellent shed base material when drainage, flexibility and cost are priorities. It is especially useful for smaller sheds, timber sheds with bearers, and gardens where water management is a concern.
The main advantage is drainage. Unlike a solid concrete pad, a well-built gravel base lets water pass through and move away from the shed. That reduces the risk of standing water beneath the floor. It can also help prevent splashback around the edges, particularly if a gravel border is extended slightly beyond the shed footprint.
Gravel bases are also easier to adjust than concrete. If the garden layout changes, the material can often be lifted, topped up or reused. This makes gravel appealing for homeowners who want a durable but less permanent solution.
However, gravel needs to be installed properly. Loose decorative pea shingle is not the same as a compacted shed base. Rounded stones can shift under weight. Angular gravel or compacted aggregate is better because the particles lock together more effectively. Paving Expert’s guidance on sub-base aggregates explains that crushed materials provide better interlock than rounded gravel, improving load-bearing performance.
A good gravel base normally includes excavation, a weed membrane, edging to contain the stone, and compaction. For heavier sheds, a stabilising grid or timber frame can help distribute weight and prevent movement.
The limitation is that gravel alone may not suit every shed floor. If the shed has no raised bearers or structural floor support, it may need a more rigid base.
Takeaway: Gravel is a strong option for drainage and flexibility, but it must be contained, compacted and paired with a shed design that can sit on it properly.

A shed base is not something you should ignore once the shed is installed. A few simple checks can extend the life of both the base and the building.
Start with drainage. After heavy rain, look for standing water around the shed. If water pools against the base, improve the fall of the surrounding ground or add a gravel channel to carry water away. Gutters and downpipes can also help by directing roof water into a water butt or drain rather than letting it splash around the shed walls.
Check for movement. Doors that suddenly stick, gaps that appear around the frame or a floor that feels uneven can indicate settlement beneath the base. With slabs, individual slabs may need lifting and relaying. With gravel, low spots may need topping up and compacting.
Keep vegetation under control. Plants, soil and leaves should not build up against the shed walls or base. Organic debris traps moisture and can accelerate timber decay. Maintain airflow around the building where possible.
Inspect timber supports. If your shed sits on timber bearers or a timber frame base, check for soft spots, rot and contact with wet ground. Treated timber lasts longer, but it still needs ventilation and drainage.
For concrete bases, watch for cracking, crumbling edges or exposed areas that direct water under the shed. Minor surface cracks may not matter, but movement or water ingress should be dealt with early.
Takeaway: A shed base lasts longest when water is kept moving away, airflow is maintained and small signs of movement are fixed early.
Most shed base failures come from avoidable mistakes. The first is building directly on grass or soil. It may look level on day one, but soil moves, holds moisture and compresses under weight.
The second mistake is failing to compact the ground and sub-base. Loose material settles over time. That settlement can twist the shed frame and cause doors or windows to bind. Compaction is not a finishing touch; it is what gives the base stability.
The third mistake is ignoring level. A shed base should be level even if the surrounding garden slopes. A leaning base puts constant stress on the structure. Some professional shed base guidance notes that the base itself should remain completely level, even where drainage is being considered.
The fourth mistake is choosing the wrong base for the shed’s use. A lightweight base may be fine for storing cushions and hand tools, but not for heavy machinery, motorcycles, workshop benches or large amounts of timber.
The fifth mistake is making the base too large without planning drainage. A concrete apron around the shed can collect water if it is not designed to shed rain away from the walls.
The final mistake is rushing concrete. Poor curing can reduce durability and increase cracking risk. Concrete Society guidance describes curing as the process of preventing moisture loss from young concrete while maintaining a satisfactory temperature regime.
Takeaway: Avoid shortcuts. Most shed base problems begin before the shed arrives, with poor ground preparation, weak drainage or rushed installation.
The best base for a shed depends on what you are building, where it will sit and how long you want it to last. Concrete is the strongest and most permanent choice for larger sheds and heavy storage. Paving slabs work well for many domestic garden sheds when laid on a proper sub-base. Gravel is excellent for drainage and flexibility, especially when contained and compacted correctly. Timber frames can help raise a shed, but they must be treated, supported and kept away from standing water.
The right decision is not simply “what is the best base for a shed?” It is “what is the best base for this shed, in this garden, for this use?” Get that answer right and your shed will be easier to install, easier to use and far more durable.
For expert guidance on choosing and installing a garden shed that suits your space, submit an enquiry for a Garden Shed in the UK with MCD Garden Buildings.